Quick Tip: How To Add Bookmarks To the Firefox Bookmarks Toolbar
Enable the Firefox Bookmarks Toolbar and make it work for you! Here's a quick guide to set it up and start saving time.
In this Quick Tip, I will cover how to enable and use the Bookmarks Toolbar in Firefox.
I literally use the Bookmarks Toolbar every single day in Firefox. It’s NOT turned on by default, and it’s not straightforward how to add bookmarks to this toolbar specifically. Here’s how you can do that.
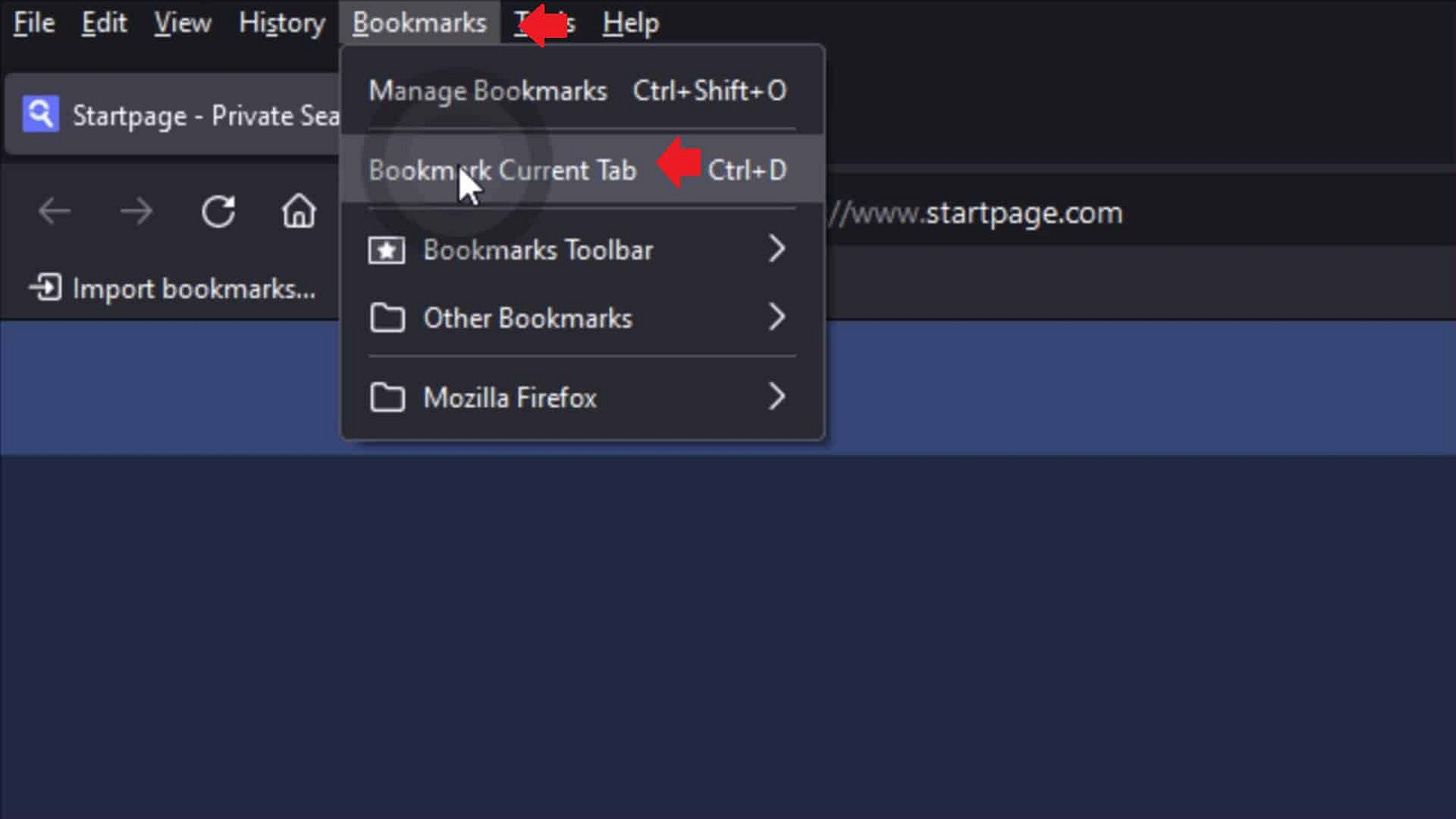
In Firefox, if you have the menu bar enabled, please left-click ‘Bookmarks” in the top menu and choose “Bookmark Current Tab”.
If you don’t see the menu (File, Edit, View, History, Bookmarks, Tools, Help) at the top left of your browser, Firefox in this example, you can access your Bookmarks and add a page to them or your Bookmarks Toolbar by clicking the “hamburger” icon in the top right (three stacked lines), then clicking “Bookmarks”.
Next, click “Bookmark current tab”.
Click the “Location” drop down menu, and choose “Bookmarks Toolbar”. “Bookmarks Menu” may be the default option, but then this bookmark won’t show up in the Toolbar.
Since the Bookmarks Toolbar isn’t shown by default, you can enable it by right clicking any empty area above your current tabs open, and above the website address bar, then hover over “Bookmarks Toolbar”, and left-click “Always Show”.


