System Cleanup Series: Uninstall (Remove) Apps and Programs in Windows 11
If you’re not using it, why let it take up space? I’ll walk you through how to find and safely remove unnecessary programs and apps in Windows 11—especially the ones you didn’t ask for.
This blog post is exclusive to paid subscribers, and is part of my System Cleanup series. One of the best ways to free up some space on your computer is to remove programs and apps in Windows 11 you're not using or no longer want. Some of these may have come pre-installed when you purchased your computer and you might not even know they are there.
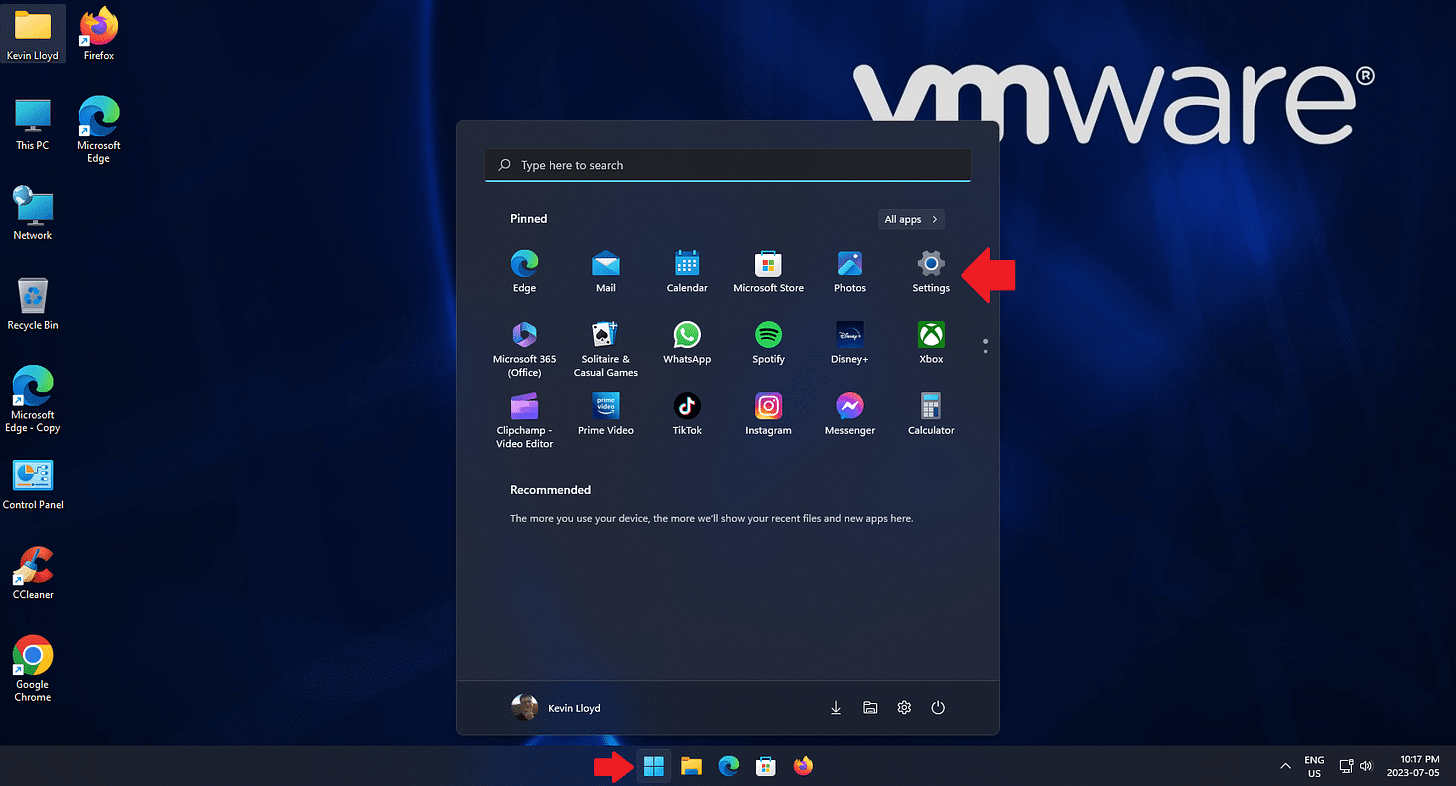
In Windows 11, open the Start Menu and click on "Settings".
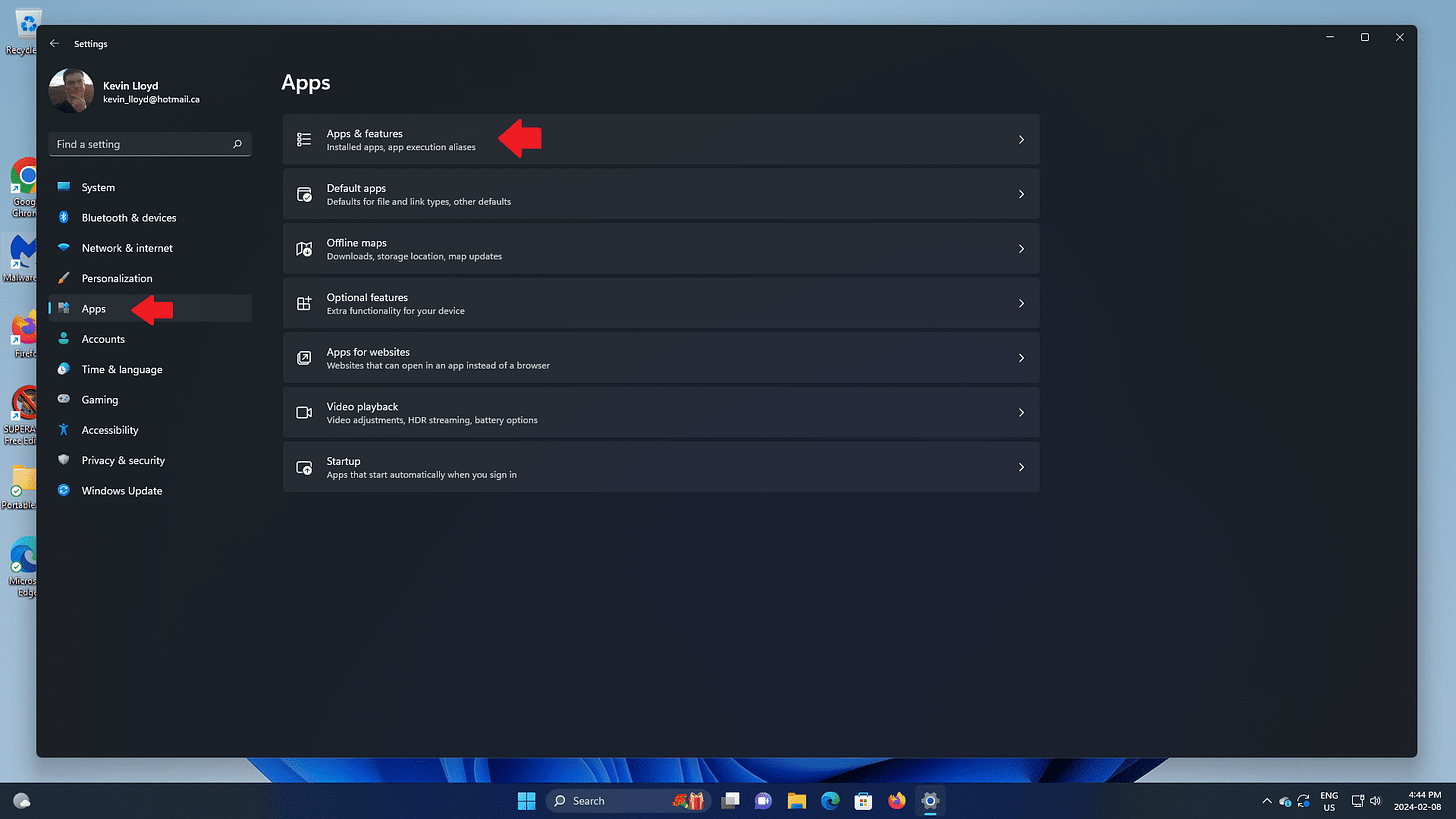
In Settings, click on "Apps", then "Apps and Features" on the right.
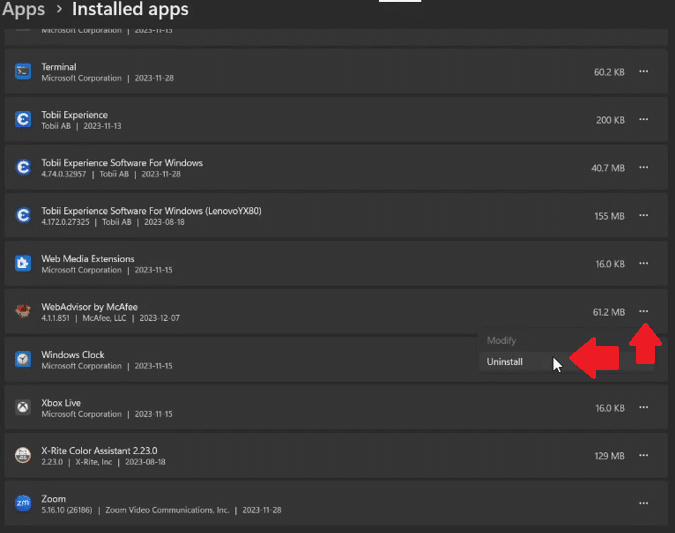
You will see the list of installed programs and apps. Please pay careful attention to each one, and ONLY uninstall (remove) items you are certain you don't need. For example, many built-in Microsoft apps are here. The majority can be removed.
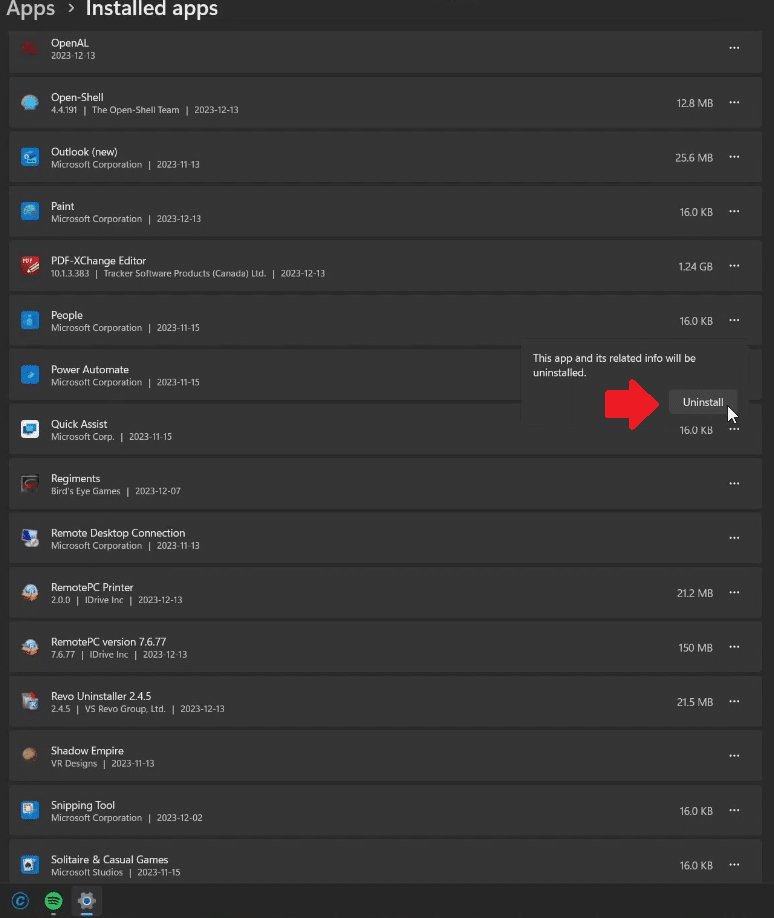
You will then see a confirmation message. If you definitely want to uninstall this program or app, click the second "uninstall" button.
Removing apps that take up almost no space doesn’t generally accomplish much, but I like to be thorough. I don't want it on my computer if I don't use it.
Larger programs are the real concern, of course, as they take up more space, but any program or app can be frustrating or annoying, so it's best to have as little installed on your computer as possible to more likely prevent problems.
Table of Contents
System Cleanup Series: How To Use PatchMyPC to Keep Your Programs Up to Date
System Cleanup Series: Uninstall (Remove) Apps and Programs in Windows 11
Thank you so much for reading this blog post and for being a paid subscriber! Your support makes my work possible.


