How To Use System Restore in Windows 11
In this blog post, I'm going to cover how to navigate to System Restore settings in Windows 11, and the process of creating a Restore Point to allow you to tell Windows to revert settings to a previous point in time, which may be necessary if a newly installed program is causing you grief, but uninstalling it isn't resolving the issue.
Click To View Larger Image
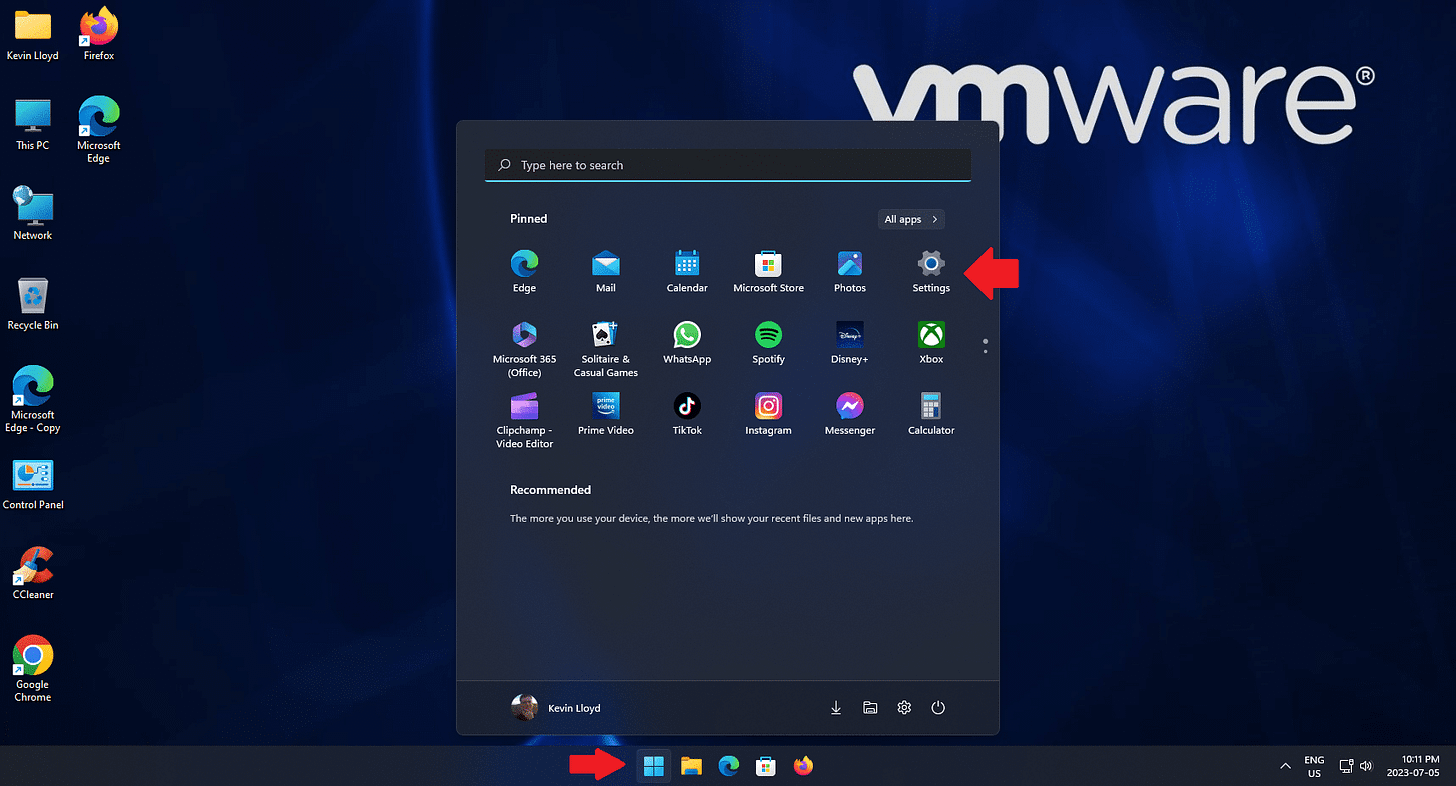
Open the Start Menu at the bottom of your screen, and click on "Settings" or the gear icon.
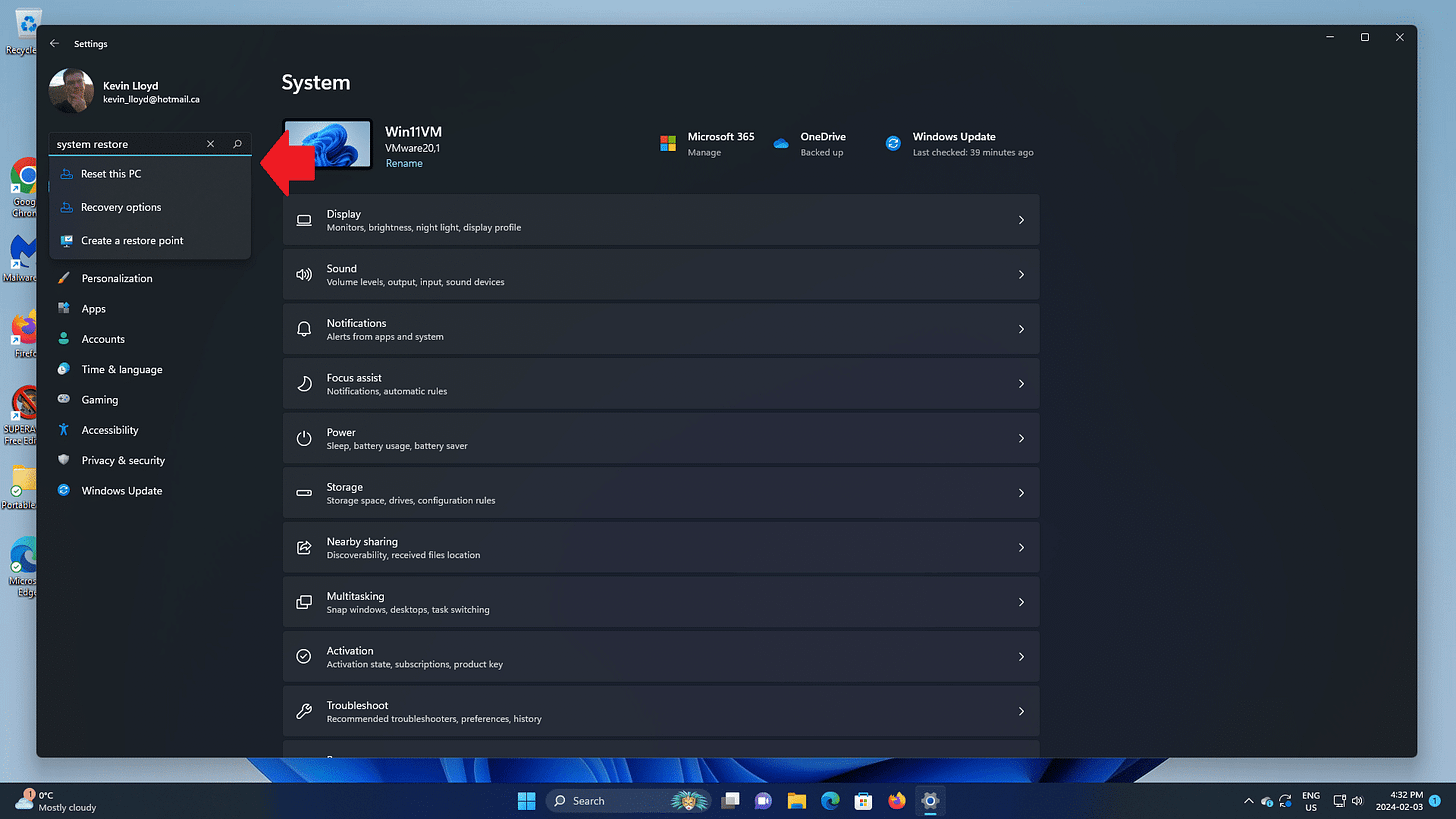
Next, type "System Restore" in the search box near the top left. System Restore is a "legacy" buried feature, so it's just easier to find it this way.
Then click "Create a Restore Point" in the search results.
Click To View Larger Image
Click To View Larger Image
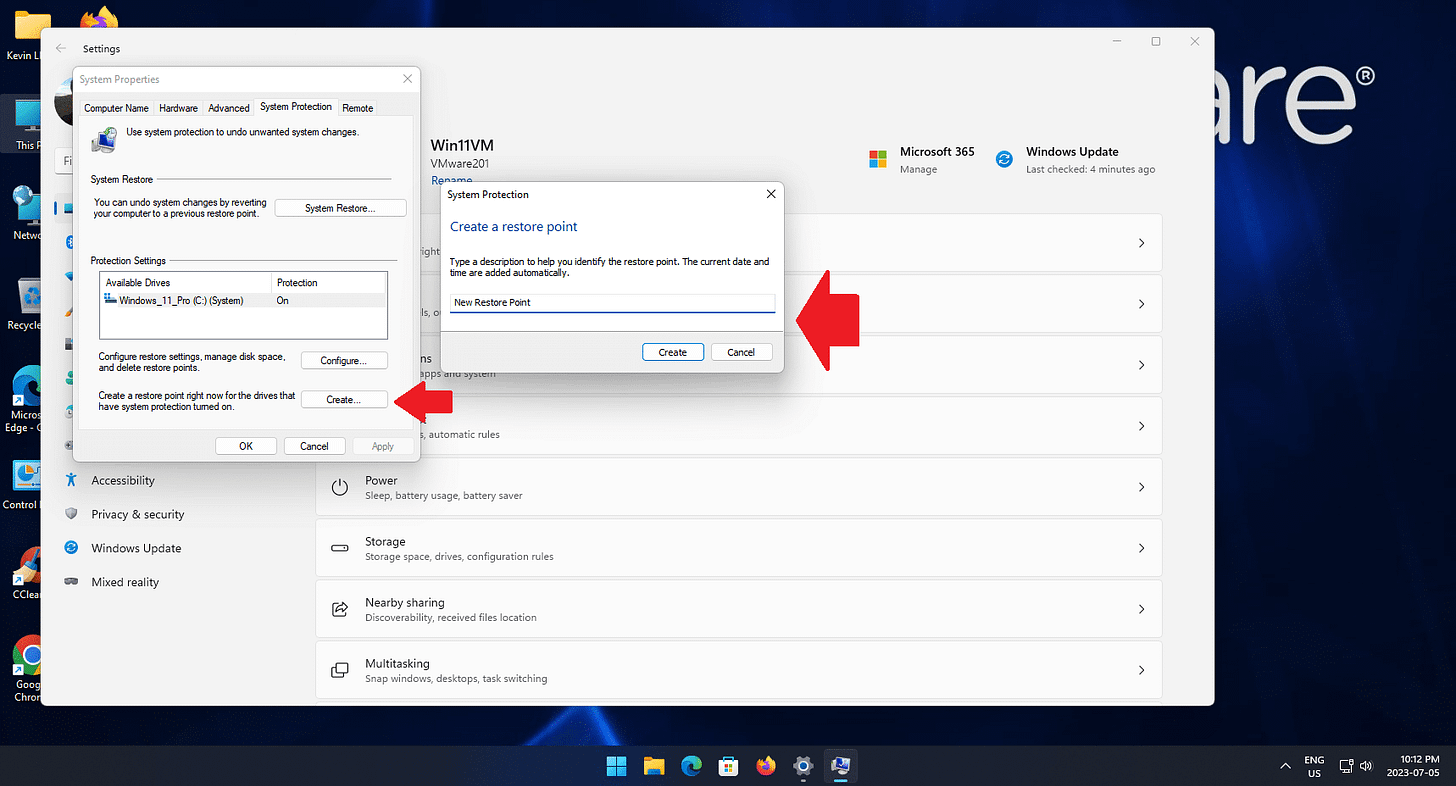
You will then see the System Restore options on your screen. If you are creating a Restore Point, click "Create", then name your Restore Point so it's easy to find in the future if you have a long list of them.
Windows will then immediately create the Restore Point.
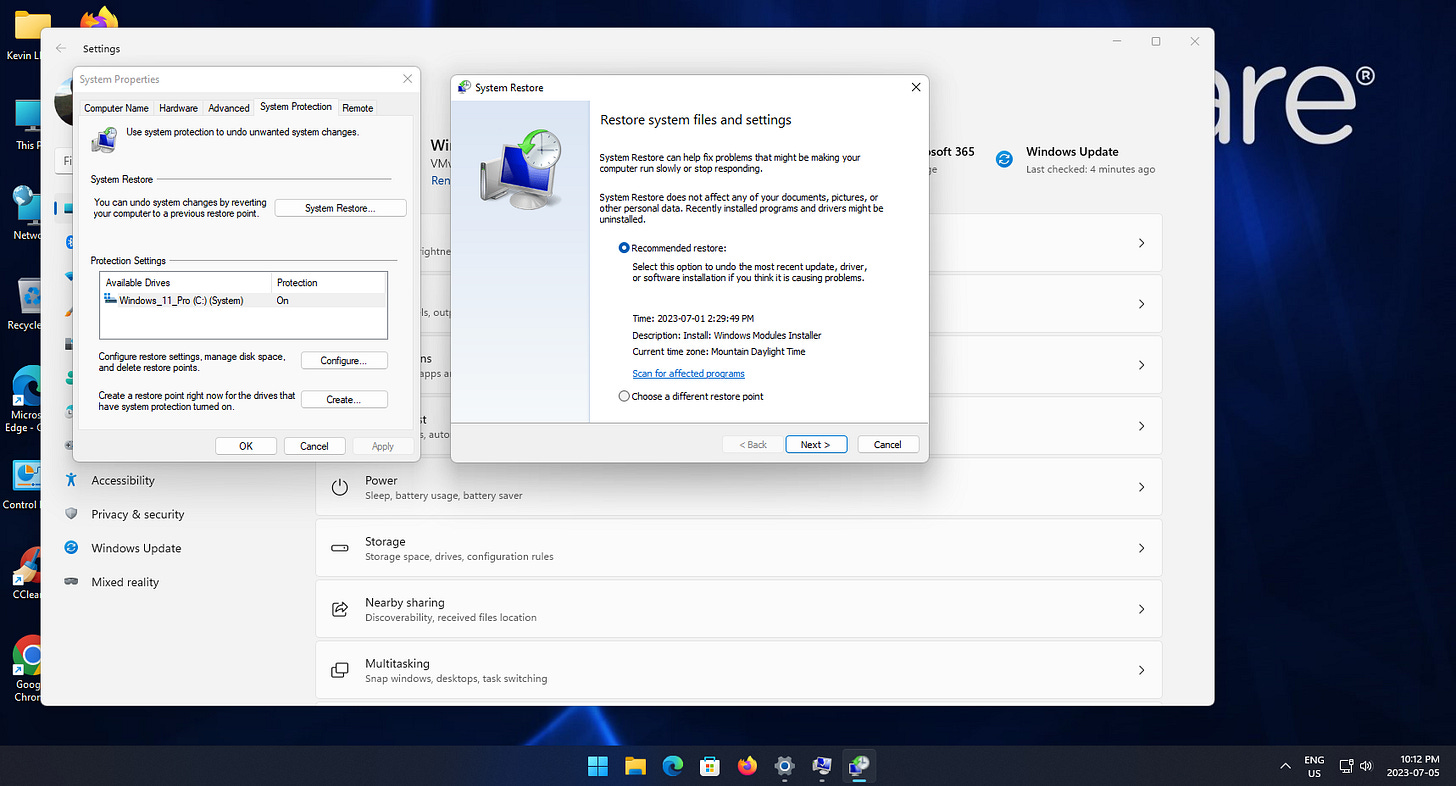
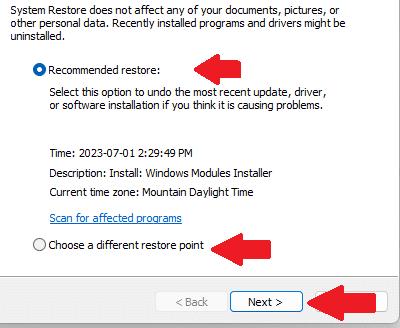
Otherwise, click the "System Restore" button. You will see two options, "Recommended restore", which is the most recently created Restore Point.
Click To View Larger Image
The second option is "choose a different restore point", where you can choose from a list of Restore Points after clicking the "next" button.
When you choose a Restore Point, your computer will automatically restart and attempt to revert back to that point in time with the settings Windows had at that time. This DOES NOT touch your files, back please always maintain current data backups whenever making changes in Windows.
Thank you so much for reading this blog post! You can keep up to date with my latest posts right here on KevinTheTechGuy.ca, or via the RSS feed. You can also check out my FREE newsletter. Please consider supporting my work directly, or using Buy Me a Coffee! Your support makes my work possible.

