How To Switch To A Local Account in Windows 11
If you want more control over your Windows login, a local account is an option. This post covers how to switch and the important security and feature differences.
In this blog post, I'm going to walk you through how to switch from a Microsoft Account to a Local User Account. There are many benefits with a Microsoft Account, but choice is important and if you'd prefer not to have your account tied to Microsoft, then a Local Account is an option.
Please note that when this process is completed, Windows will automatically log you out of your account, so be prepared to save anything you might be working on first.
Here's how to do that.
What Changes When You Use A Local Account instead of a Microsoft Account? (click to expand)
For the most part, a Local Account in Windows 11 looks and behaves much like a Microsoft account, but there are key differences:
A Local Windows Account Doesn't Require A Password
You are not required to protect a local account with even a simple password, making the system much less secure. This is a particularly bad problem if you give the local account administrative capabilities, giving someone else easy access to anything on that computer.
No Two-Step Authentication
Your Microsoft account can and should be protected with Two-Factor Authentication (2FA). A Local Account is not protected by 2FA, and cannot be. Though if you use Windows Hello (facial recognition or fingerprint) and a secure password, you should be fine.
No Device Encryption (Windows 11 Home only)
When you sign in to Windows 11 Home with a Microsoft account, automatic disk encryption is enabled. This helps protect the documents and other data it contains from being stolen or otherwise accessed by others.
When you sign in with a local account, your computer's storage is not encrypted by this feature, and cannot be because the recovery key for this encryption must be stored online in a Microsoft account.
That said, if you are using Windows 11 Pro with a local account, you can enable BitLocker drive encryption manually after the initial sign in.
No Account Recovery
Your Microsoft account is protected by Microsoft, so you can recover your account from your online account if you forget your password or the account is somehow compromised. There are no such protections with a local account.
Can't Synchronize Account Settings
When you sign in with a Microsoft account, Windows 11 uses a feature called Windows Backup to sync a limited set of settings to your cloud account. so it can be restored when you sign in with that same account using another computer. This functionality is not available with a local account.
No Automatic Sign In To Microsoft Apps
When you sign in to Windows 11 with a Microsoft account, you are automatically signed in to Microsoft Store apps. You can’t use some apps and experiences with a local account.
The Microsoft Store app runs without a Microsoft account, and it even lets you download and update free apps without signing in.
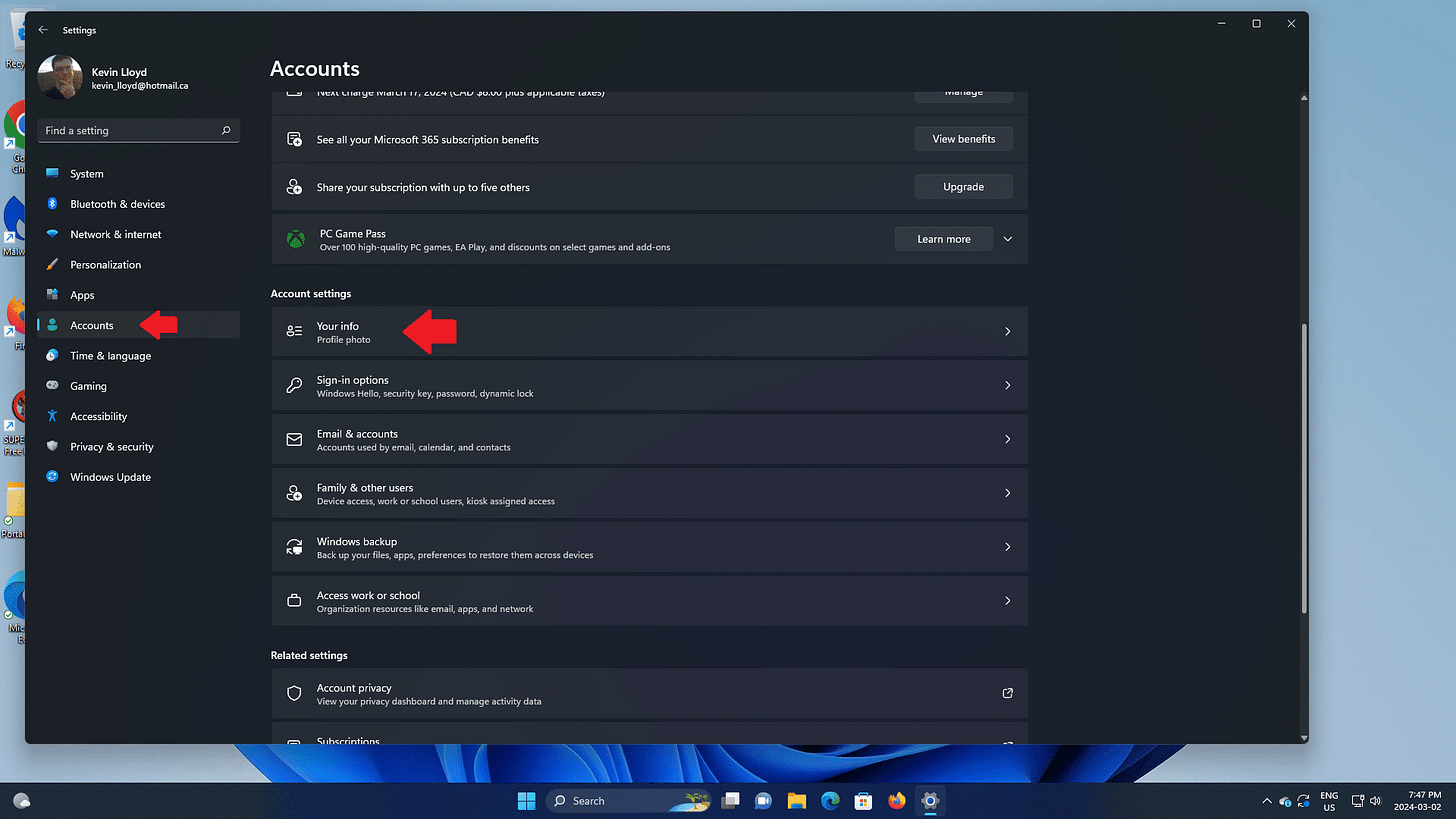
Open the Start Menu and go to Settings. Then go to "Accounts" on the left, and "Your Info" on the right.
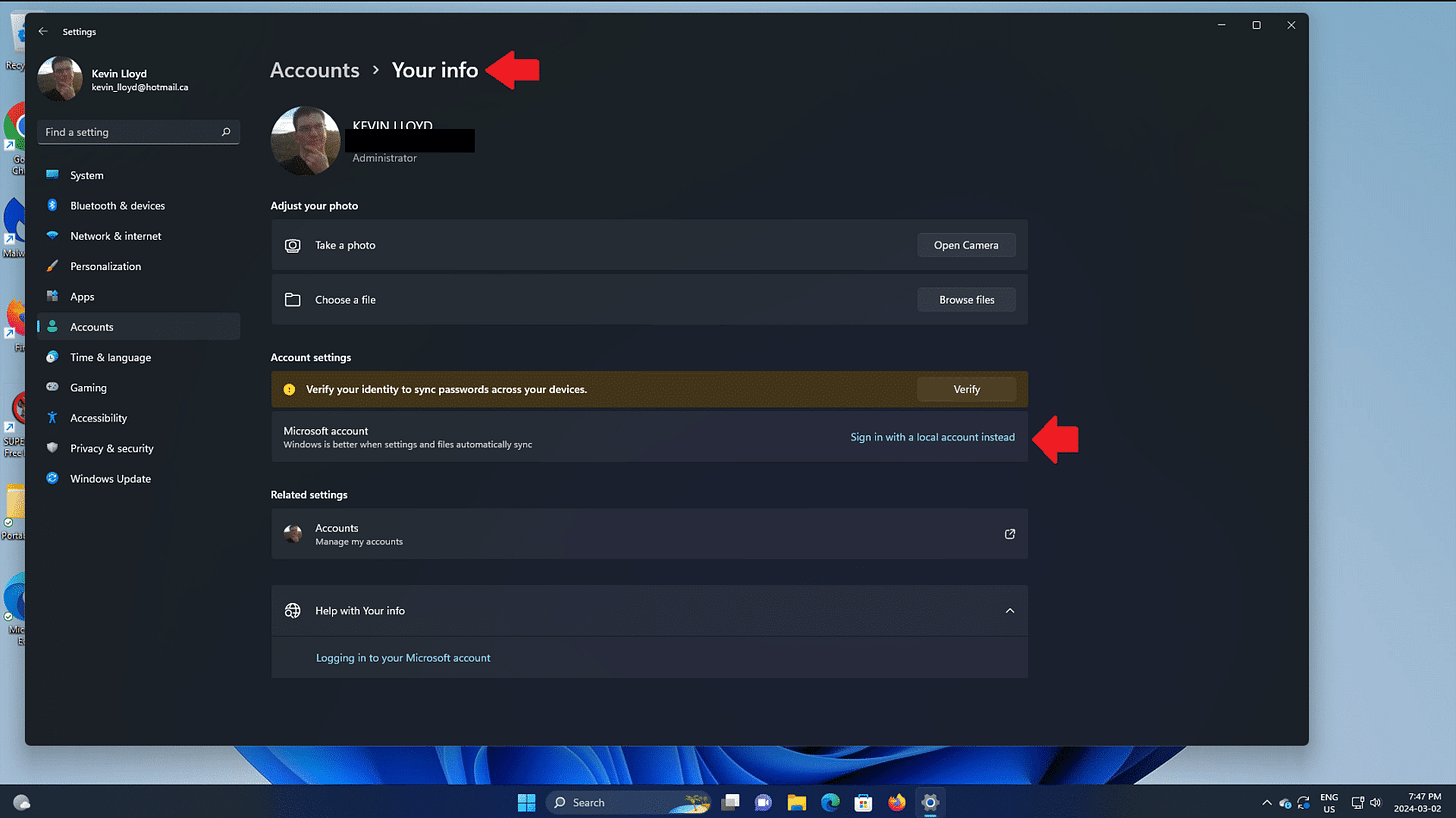
On the “Your Info” page, under “Account Settings”, click the link that says “Sign in with a local account instead”.
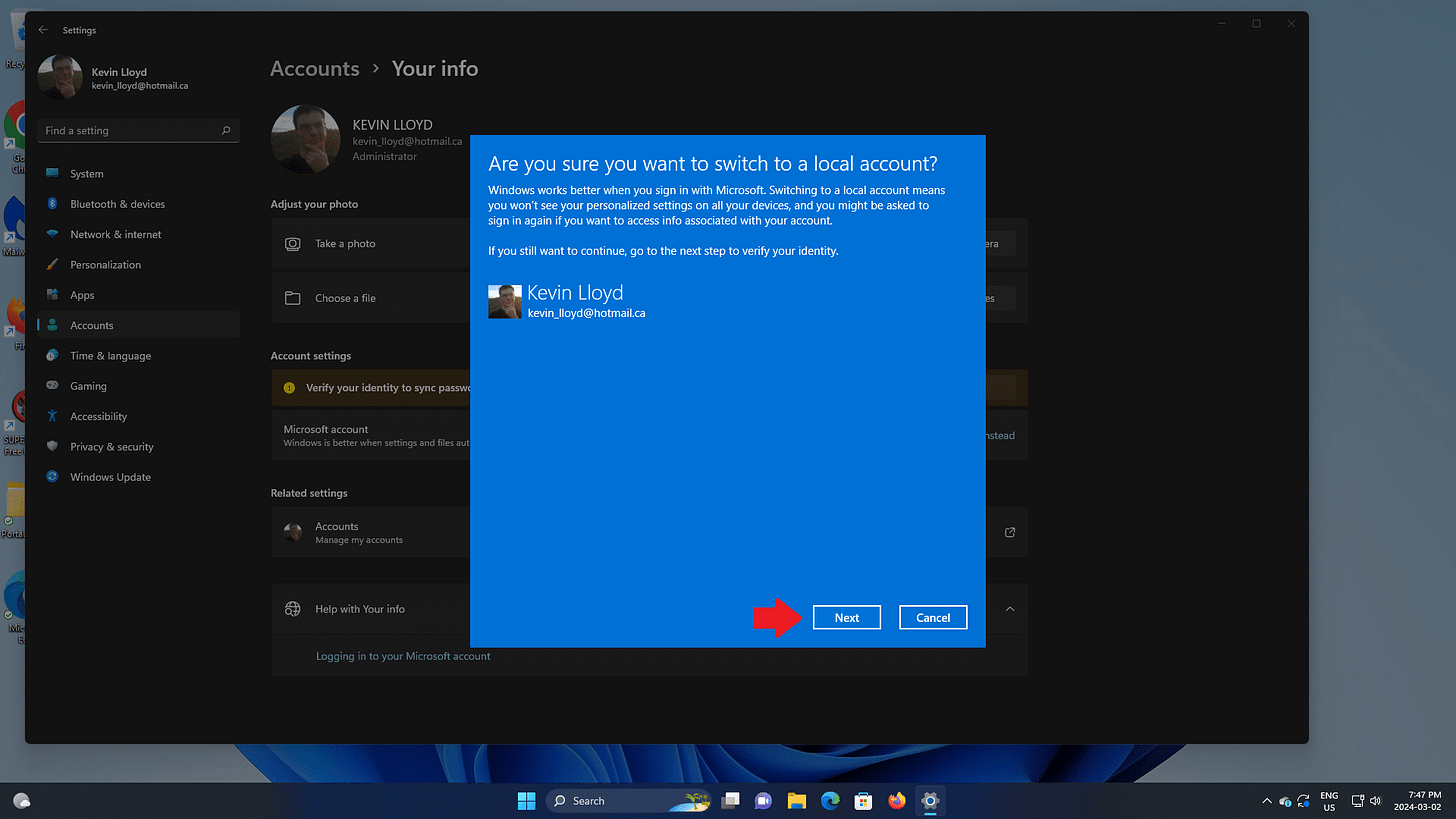
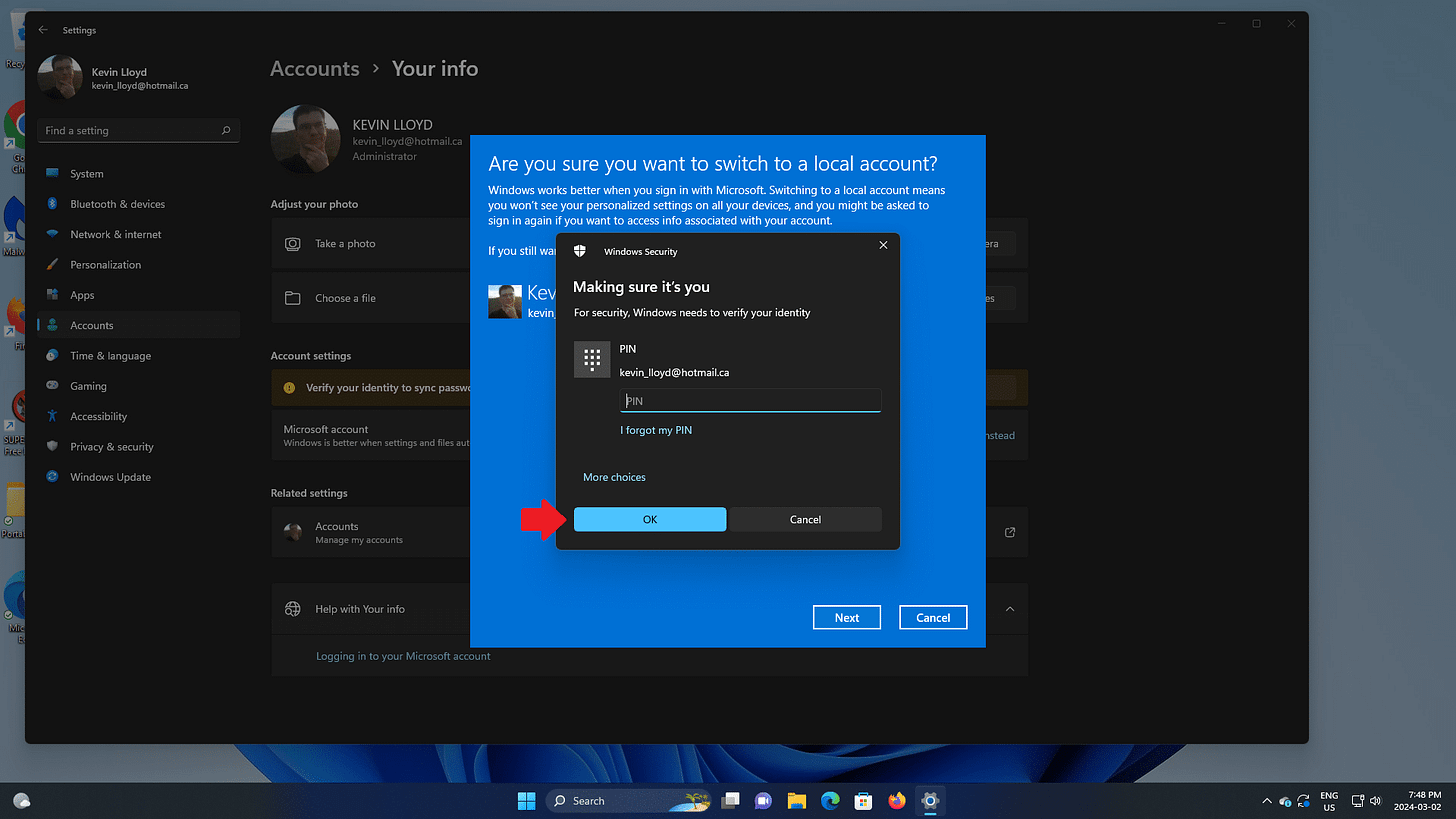
A blue window will appear asking "Are you sure you want to switch to a local account?
Click the "next" button.
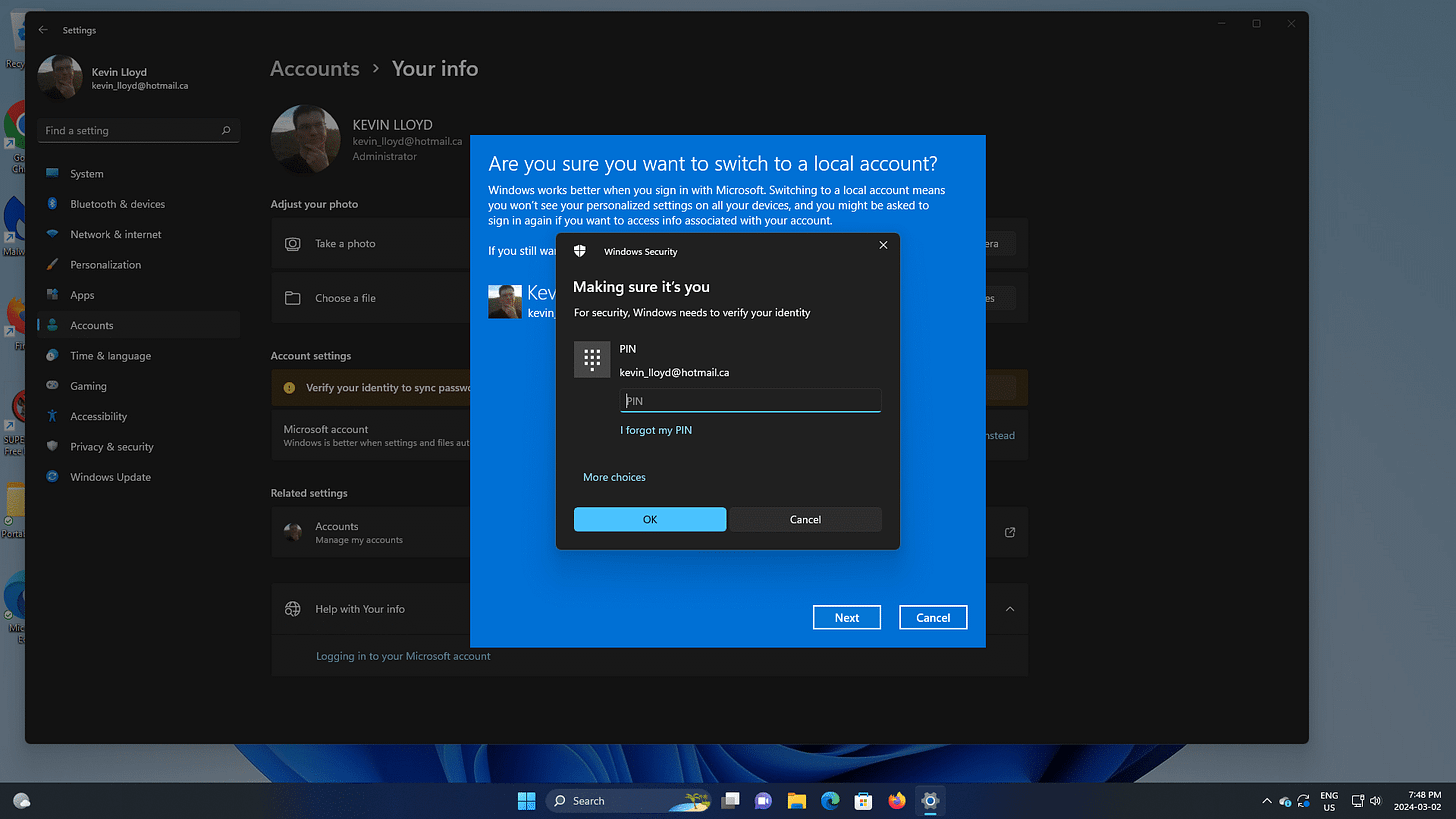
Enter your current Windows PIN or password, then "OK".
Windows will complete the process, then automatically log you out, so again, be prepared for that and save anything you might be working on. You can then log in to your new Local User Account.
Thank you so much for reading this blog post! You can keep up to date with my latest posts right here on KevinTheTechGuy.ca, or via the RSS feed. Please consider supporting my work, or using Buy Me a Coffee! Your support makes my work possible.


